
To install the ChurnZero Javascript via Google Tag Manager (GTM), follow the steps outlined below.
Special Note: If you install the ChurnZero JS through this method, there will be no reference to the ChurnZero JS in your application's code. You should alert your Development Team that you have installed the CZ JS through this method and that this installation is dependent on the availability of the AccountExternalID and the ContactExternalID. They should not remove those fields or the installation will break.
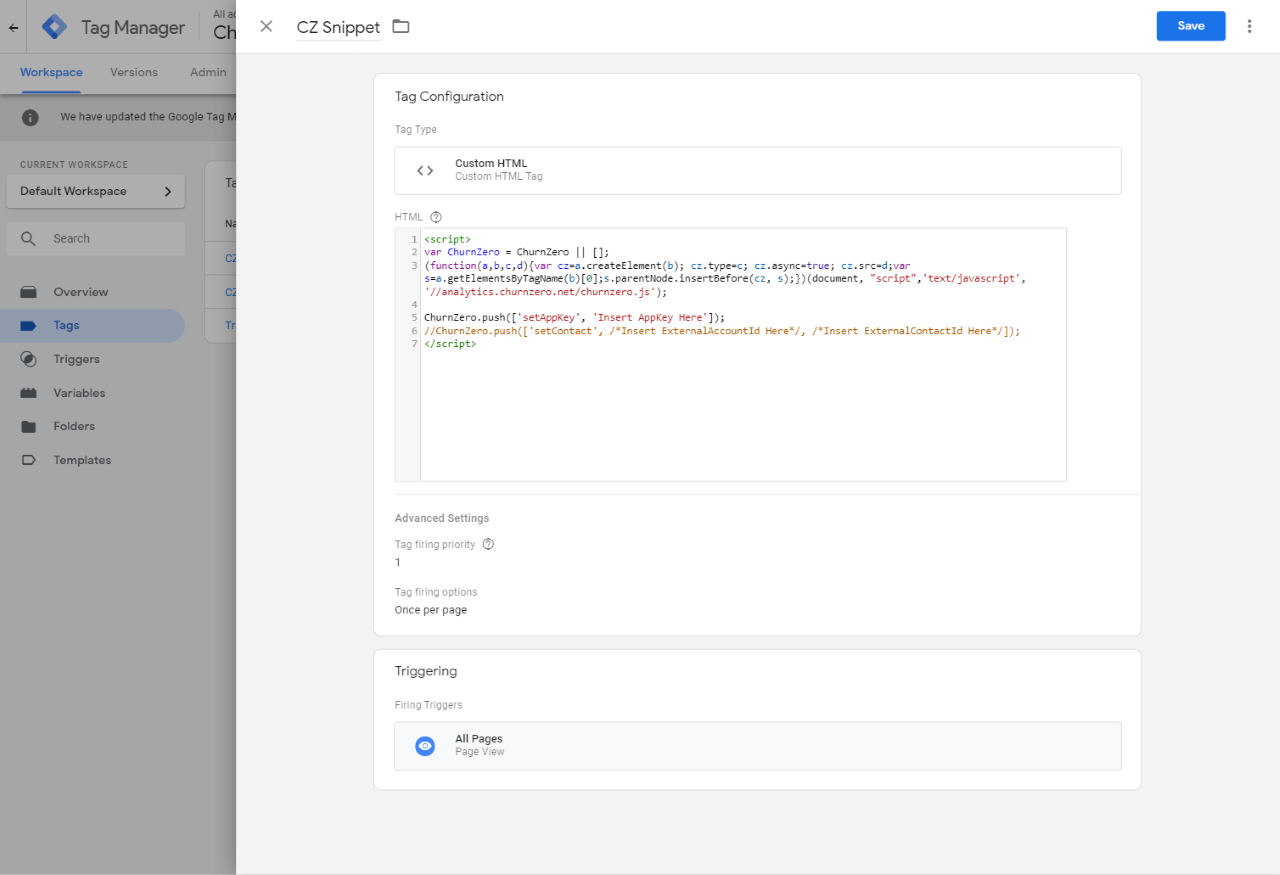
Step 1: Create a New Custom HTML Tag For The ChurnZero Snippet That Is Set to Fire Once Per Page On All Pages
Be sure to add your ChurnZero AppKey and comment out the setContact line. We will be making the setContact call separately once we have the contact info.
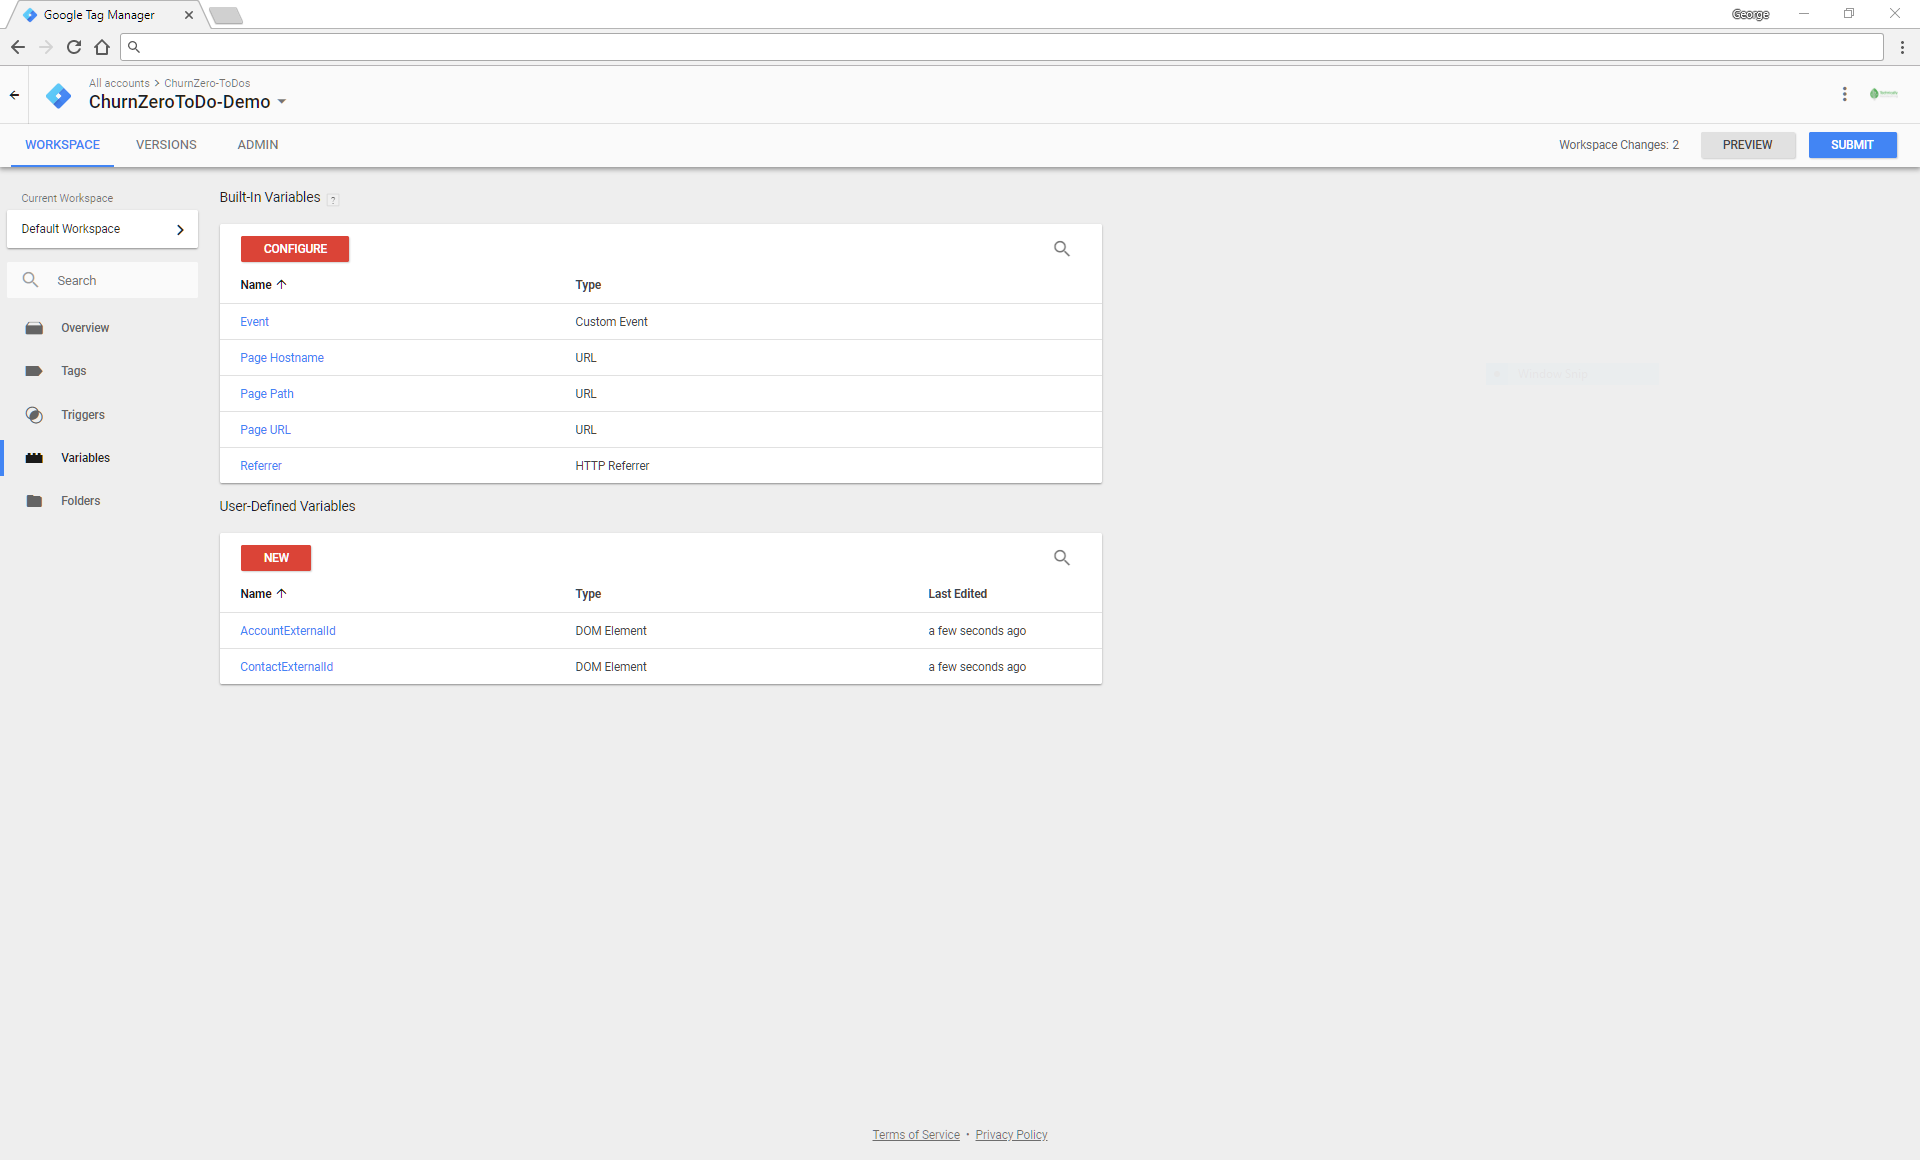
Step 2: Add User-Defined Variables for AccountExternalId and ContactExternalId
In this case we are using DOMElements that contain the AccountExternalId and ContactExternalId but the type of variable might be different for your GTM instance. If your ExternalIds are exposed as global JavaScript variables then you will want to use a JavaScript Variable type User-Defined Variable to capture this information.
- Your development team should be able to tell you how the AccountExternalId and ContactExternalId are exposed.
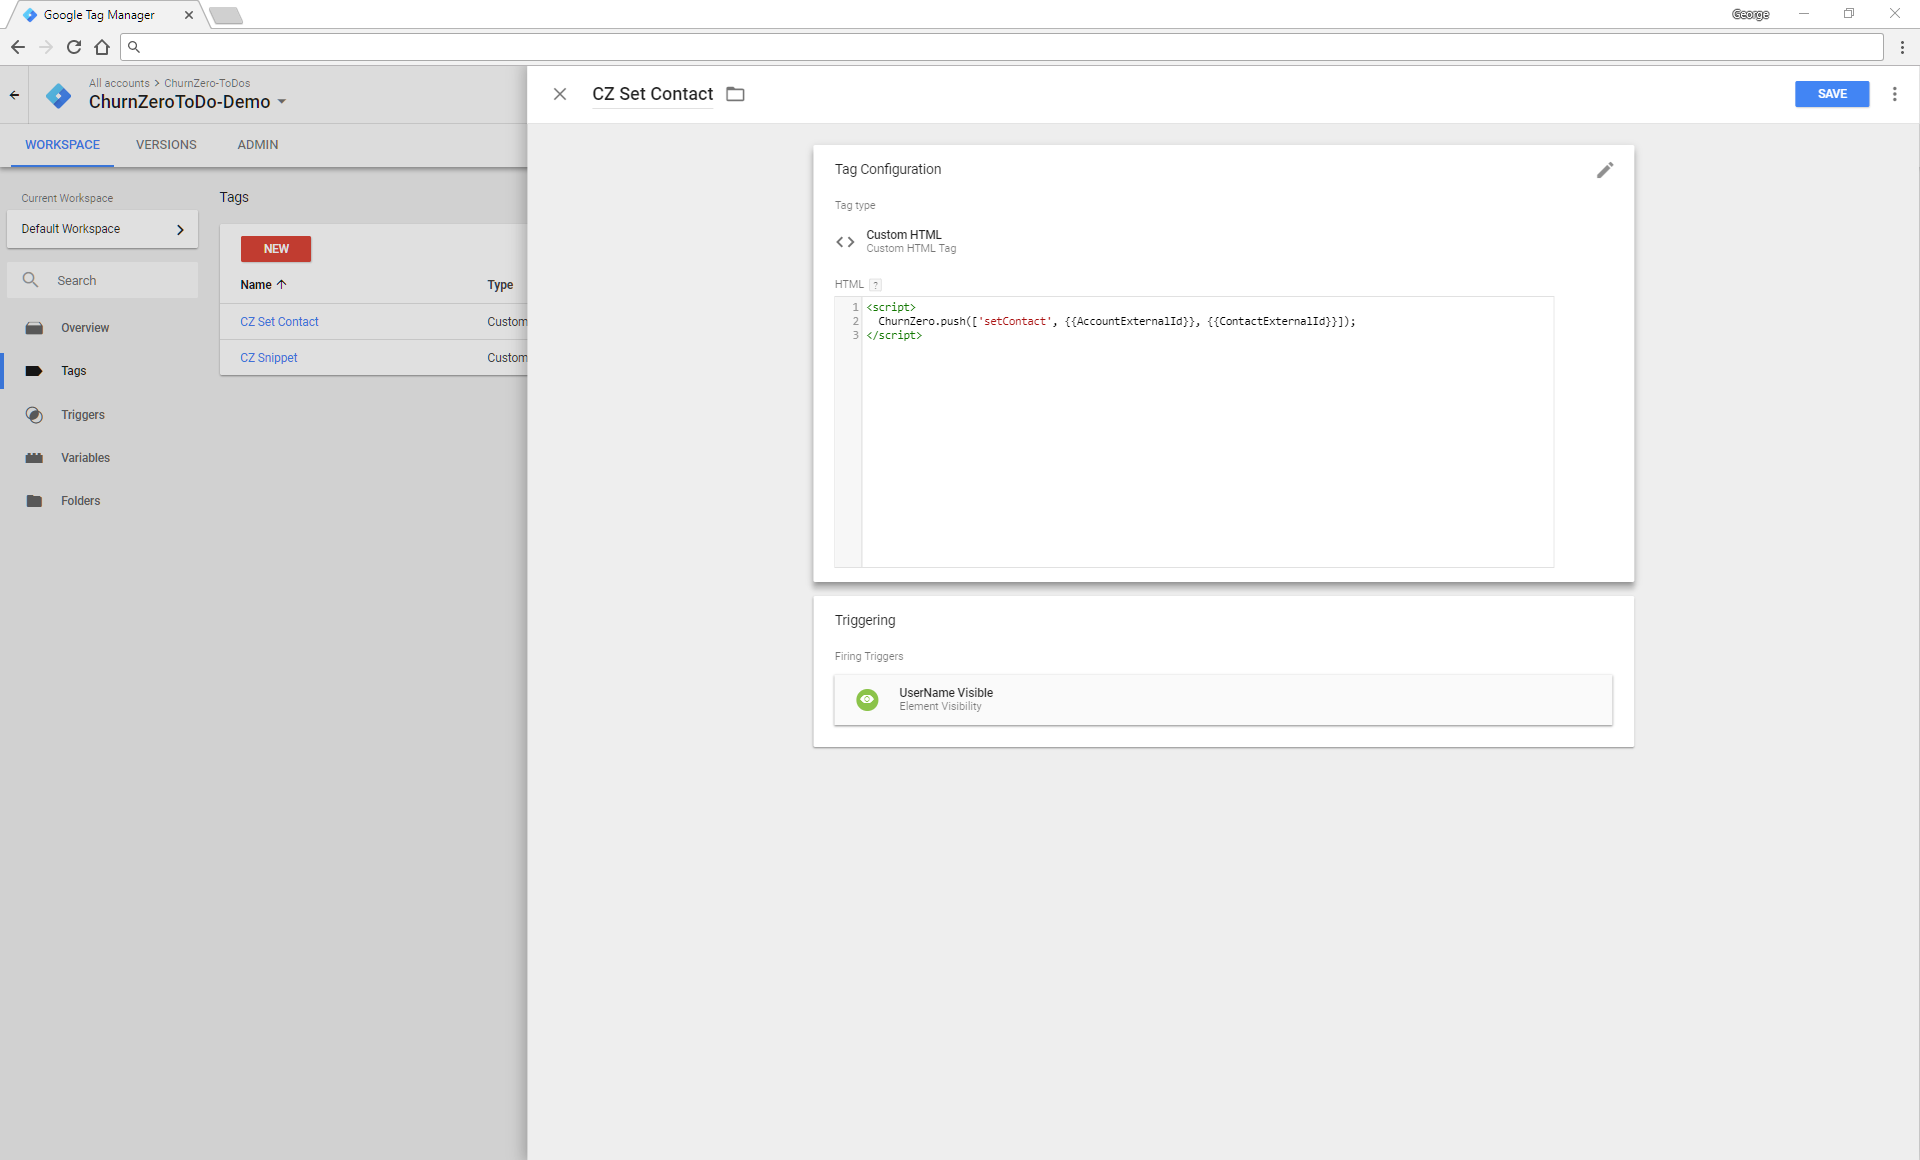
Step 3: Add Custom HTML Tag for calling SetContact
Access the global ChurnZero object and set the contact using the User-Defined Variables we created in Step #2.
- In this case since we are using DOMElements we have also configured a Firing Trigger so that the script only fires once the DOMElements are visible. This might not be necessary for your setup if the AccountExternalId and ContactExternalId are immediately available.
- The important take away here is to be sure your SetContact tag does not fire until the AccountExternalId and ContactExternalId are available to be read by Google Tag Manager.
Step 4 (OPTIONAL): Fire Events to ChurnZero
Once the ChurnZero snippet is loaded and setContact is being properly called, it is possible to use Custom Scripts and Triggers in GTM to send Events that occur in the browser to ChurnZero.
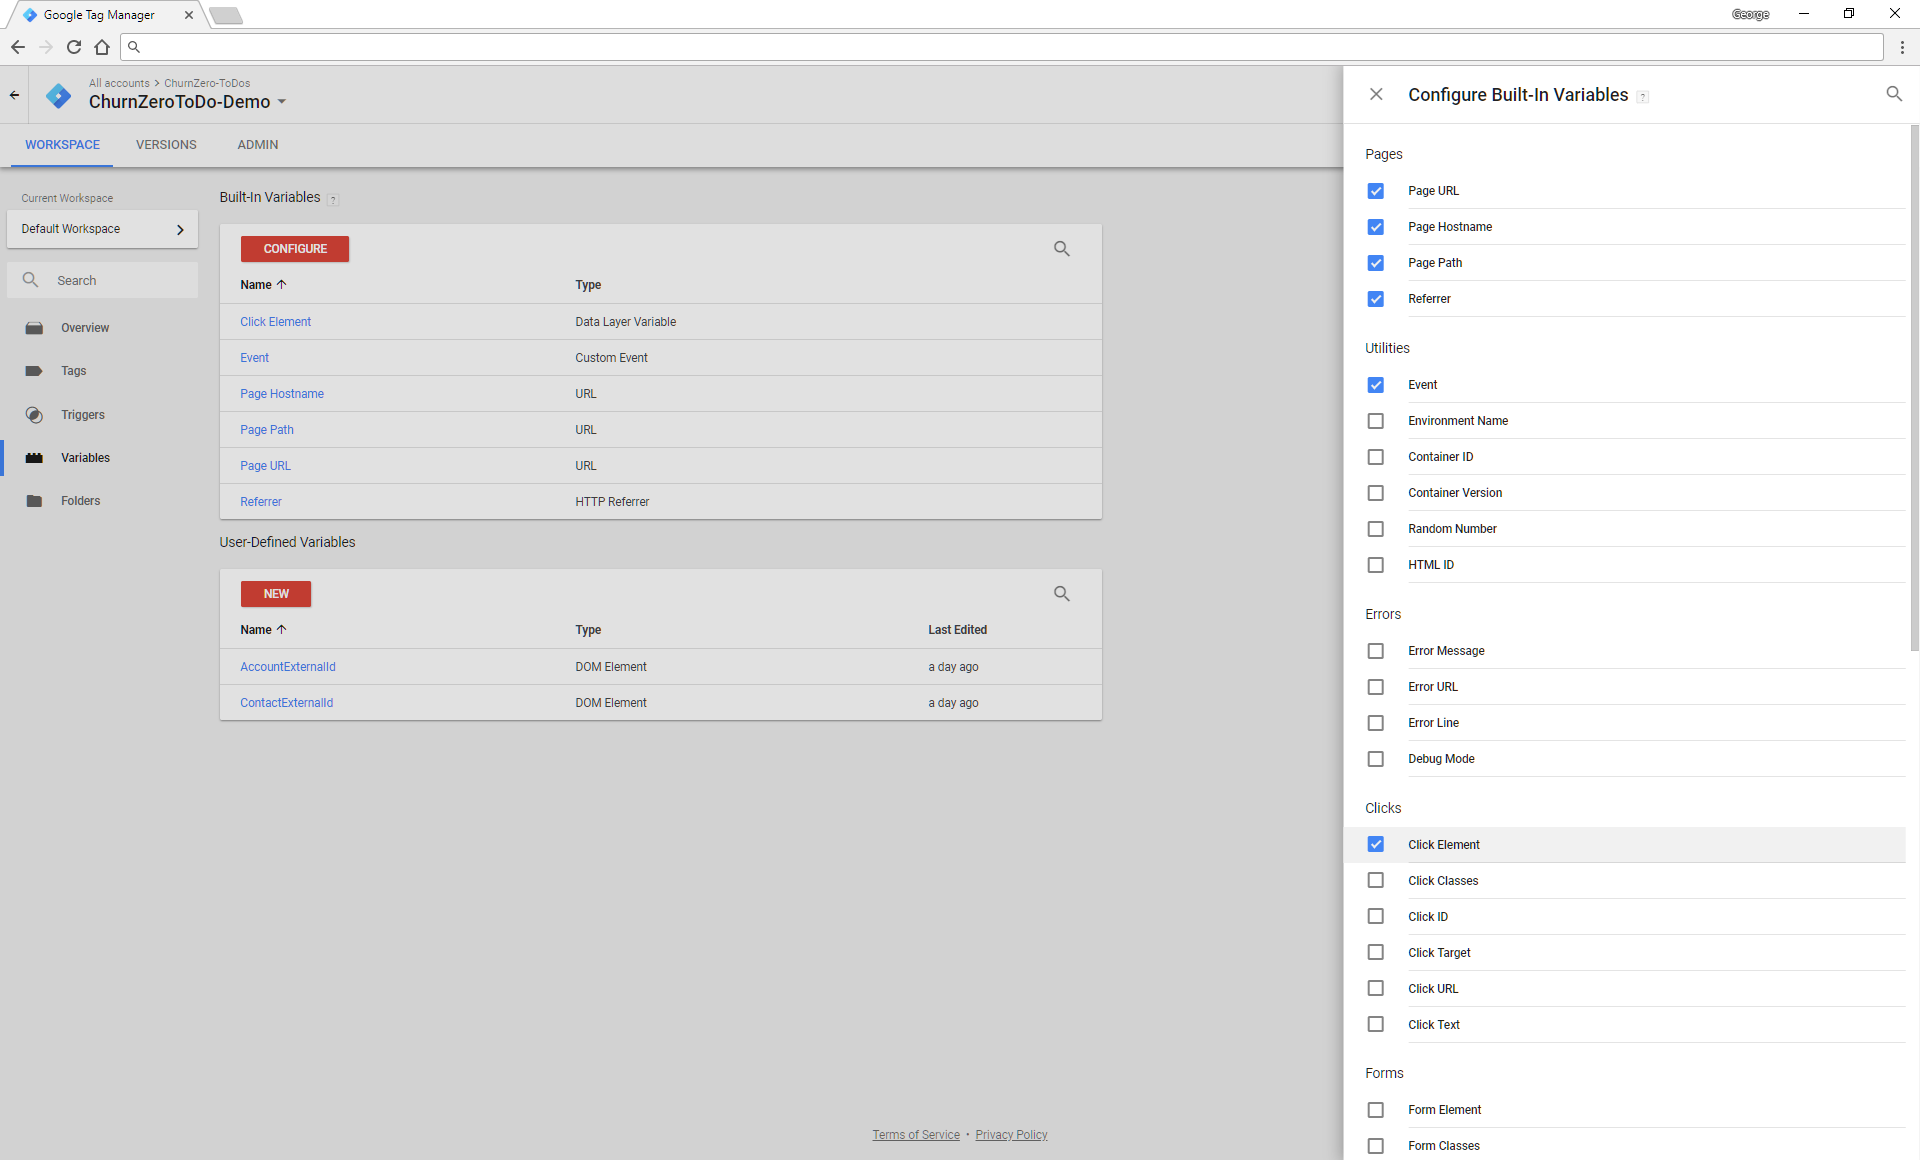
Important Note: Before trying to wire up an Event, you need to ensure GTM has the Built-in Variable of "Click Element" enabled. To do check this, go to Variables and click Configure in the Built-in Variables section. Within the configuration menu, ensure that "Click Element" is enabled.
Let's explore this concept by imagining we would like to fire an Event when a user clicks a button with an id of "my-custom-button".
The first step is to create a Trigger in GTM to identify the element we would like to monitor; in this case it is a button with an id of "my-custom-button".
- We will use CSS selector syntax to identify our element.
- CSS selectors are a very broad topic, beyond the scope of this tutorial. Understanding how they work can open the door to lots of advanced tracking techniques. But for this tutorial, all we need to understand is that the # symbol means id.
- So for our button we can do #my-custom-button:

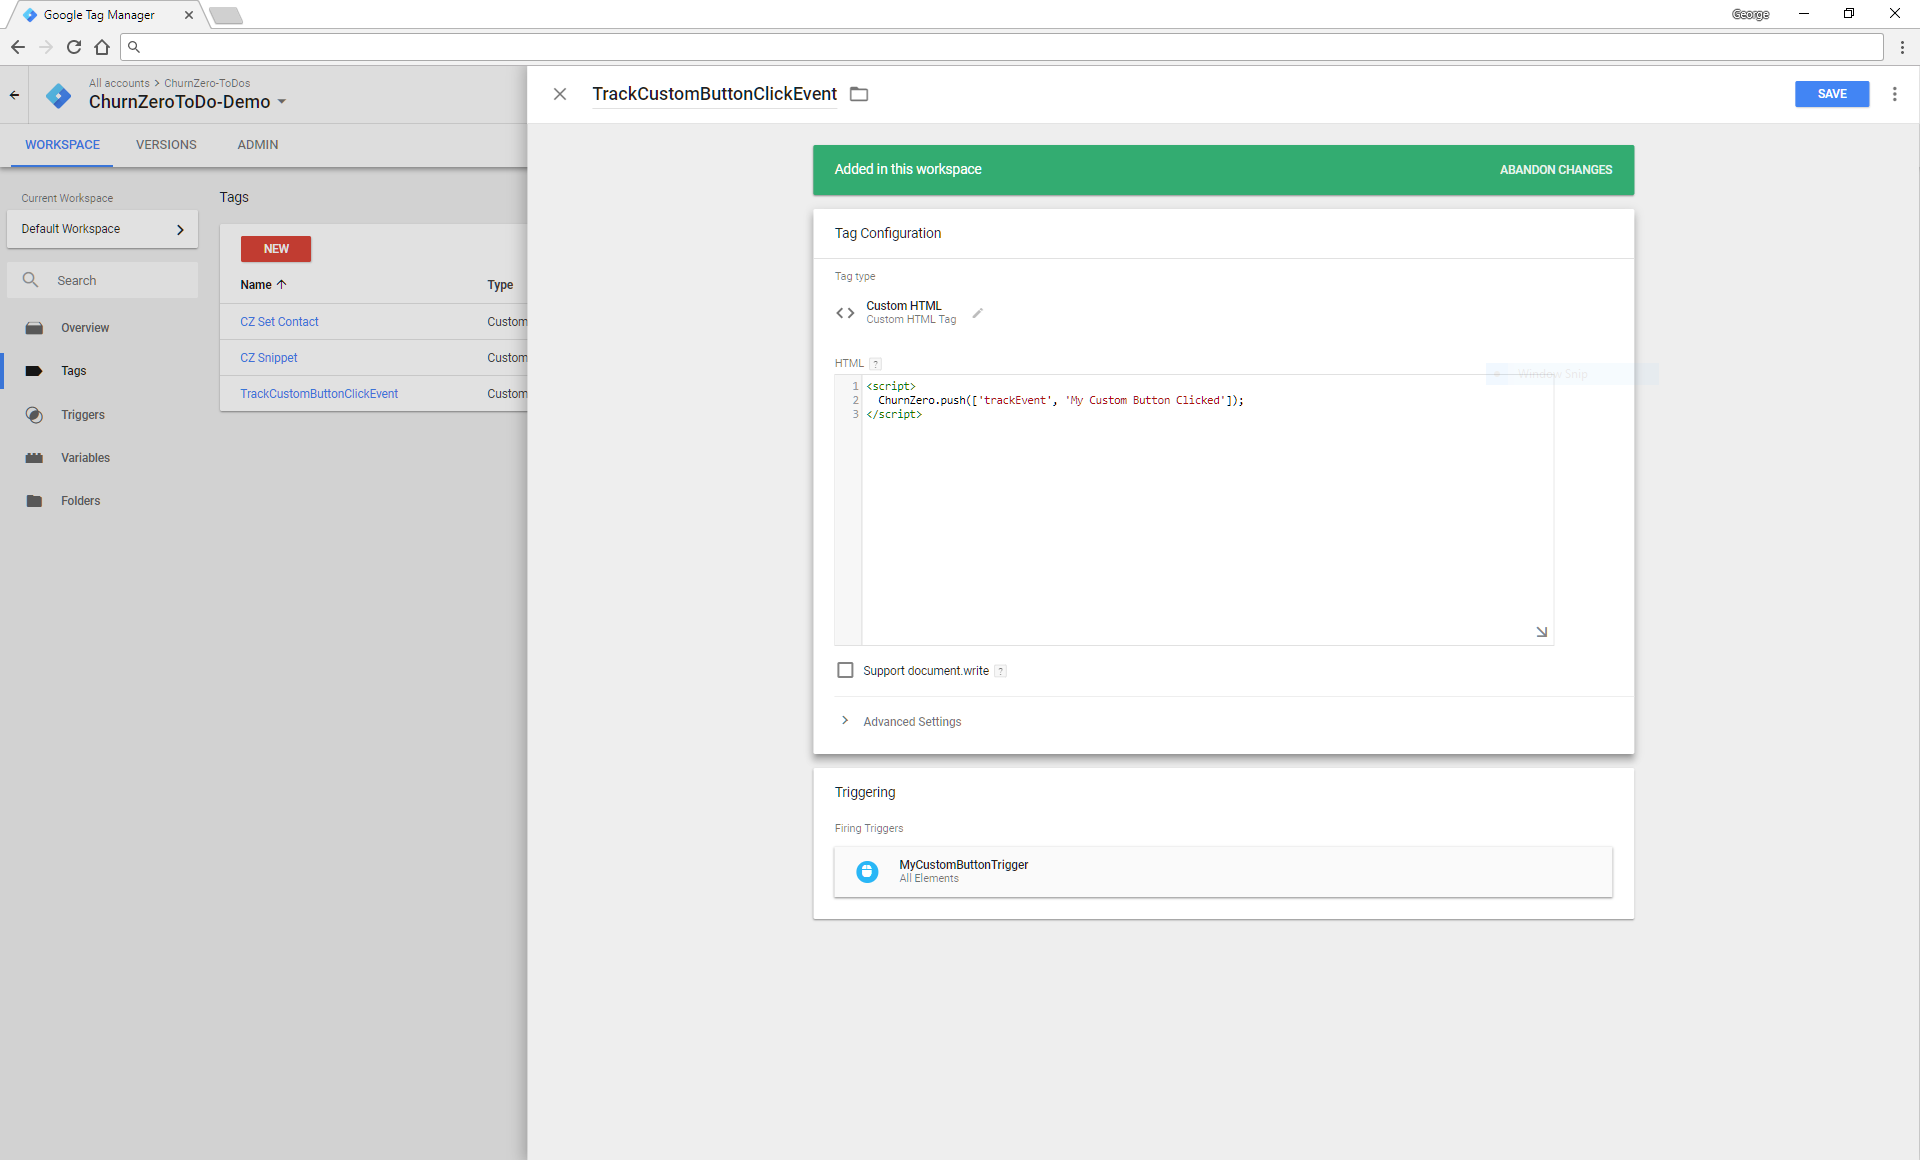
Next we need to create the Custom Script to execute the TrackEvent.
- First we are simply telling the ChurnZero JavaScript (that we already loaded in Step #1) to record that an Event has occurred.
- The second parameter is what we would like to name our Event. This is the Event name that will be used all around ChurnZero,so it should be clear but concise.
The final step is to connect the Custom Script to the Trigger we created so that it only fires when an element with an id of "my-custom-button" is clicked.
Comments
0 comments
Article is closed for comments.